
In any thermal printing environment — whether direct thermal or thermal transfer — print quality and reliability depend as much on maintenance as they do on labels and ribbons. One of the most common causes of print faults, scanning failures, and premature printer wear is surprisingly simple: dirt build-up inside the printer.
Dust, adhesive residue, and microscopic debris naturally accumulate over time. Left unchecked, they interfere with sensors, damage printheads, and degrade output quality. The good news is that regular cleaning is quick, inexpensive, and highly effective.
This guide explains why cleaning matters, what components need attention, and how to clean a thermal printer safely, based on issues we see every day in real-world label printing environments.
Why Cleaning Matters
How to Clean Your Printer
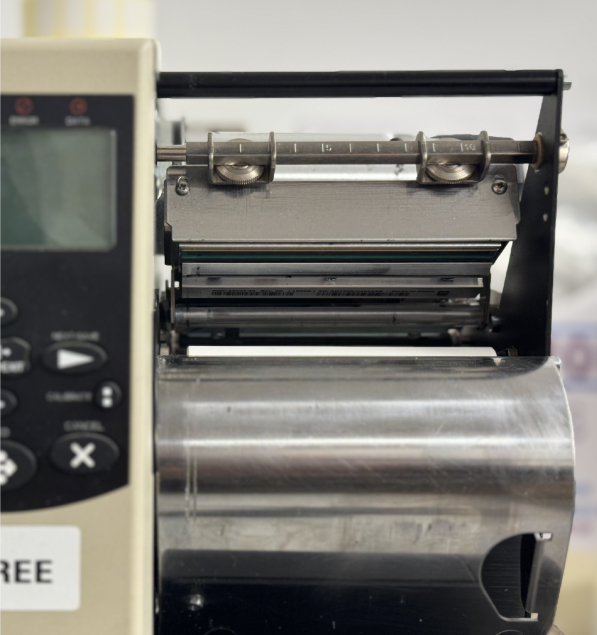
A close-up of a thermal printer being cleaned with a lint-free wipe
Why Regular Cleaning Is Essential
Thermal printers operate with fine tolerances. Even small amounts of contamination can have an outsized effect on performance, often mimicking label, ribbon, or software issues.
Poor print quality: Streaks, faded areas, or missing elements that cause barcodes to fail.
Premature printhead wear: Adhesive residue acts as an abrasive surface on the printhead.
Label jams and misfeeds: Build-up on rollers leads to inconsistent feeding.
Sensor errors: Dust and debris interfere with gap or black-mark sensors.
In practice, many “mystery faults” are resolved simply by cleaning the printer — particularly after changing label materials or adhesives.
What You’ll Need
Cleaning a thermal printer doesn’t require specialist tools, but it does require the correct materials:
Isopropyl alcohol (99%): Use wipes or apply sparingly with a cotton swab.
Lint-free cloths or swabs: Prevent fibres being left behind.
Compressed air: For removing loose dust and debris.
Avoid household cleaners, abrasive materials, or sharp tools — these can permanently damage the printhead or rollers.
How to Clean a Thermal Printer
Cleaning should ideally be carried out every time you change a roll of labels or ribbon. High-volume or adhesive-heavy applications may require more frequent attention.
Step 1: Power down.
Turn off the printer and disconnect the power before opening the cover.
Step 2: Clean the printhead.
Using a dedicated printhead cleaning wipe or a lint-free swab with isopropyl alcohol, gently wipe across the printhead. Do not scrub. Allow it to dry fully.
Step 3: Clean the platen roller.
Wipe the rubber platen roller to remove adhesive residue and dust.
Step 4: Clean the sensors.
Carefully wipe label sensors to ensure accurate label detection.
Step 5: Final check.
Use compressed air to remove remaining debris, then close the printer and reconnect power.
Good Practice & Common Mistakes
Always allow cleaned components to dry fully before printing
Never touch the printhead with bare fingers
If issues persist, consider media compatibility or printhead wear
From experience, routine cleaning significantly reduces downtime and extends printhead life — especially when using high-tack adhesives or resin ribbons.
For more information on A Clean Printer is a Happy Printer A Practical Guide to Thermal Printer Cleaning talk to North & South Labels Ltd