

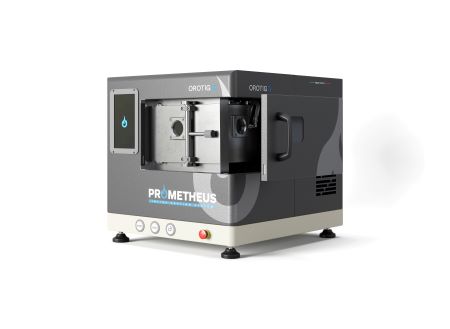
The Orotig Prometheus Automatic Casting Machine is a compact, fully automated casting solution designed to deliver consistent, high-quality results in precious metals such as gold, silver and platinum.
With touchscreen operation, integrated safety systems and repeatable programme control, it is built for workshops that require professional performance without unnecessary complexity.
This step by step guide outlines the full setup process, from initial unboxing through to completing your first casting cycle.
Unboxing and Initial Preparation
Start by unboxing the Orotig Prometheus and make sure you have all of the relevant documents needed for setup. This includes the user manual, setup guidance and supporting paperwork required for safe installation.
The accessory kit should also be unpacked at this stage. It contains the core components used during casting, including:
- Flasks
- Crucibles
- Support rings
All accessories are designed specifically for compatibility with the machines chamber system.
Vacuum Pump Installation
The vacuum pump is an important part of the casting process and must be prepared before operation.
To set up the pump, loosen the reservoir cap and fill the chamber with vacuum oil using the funnel provided. The oil level should sit around halfway, remaining below the maximum fill indicator.
Once filled, tighten the cap securely. The vacuum system is now ready for connection.
Cooling System Fill Procedure
The Orotig Prometheus requires a filled cooling tank to regulate temperature during casting cycles.
Using a 2.5mm Allen key, remove the rear panel of the machine to access the cooling hose. Locate the clear pipe with the red end cap, remove the cap and insert the funnel.
Fill the internal tank with clean tap water up to the maximum level mark, then reseal the hose and refit the rear panel securely.
Correct cooling setup is essential for safe and stable casting performance.
Hose and Power Connections
With both vacuum and cooling systems prepared, the machine can now be connected.
Attach the vacuum pump hose to the rear of the Orotig Prometheus using a 13mm wrench, ensuring the connection is tight and sealed. Then connect:
- The vacuum pump cable with its protection system
- The main power cable
At this stage, the machine is connected and ready for gas setup.
Argon Gas Integration and System Activation
Argon gas is essential for the casting process, supporting clean chamber conditions and casting consistency.
Connect the blue argon tube to the rear input port labelled Argon In. Ensure that gas pressure is set to at least 6 bar before proceeding.
Adjust the air and argon pressure knobs on the back of the unit as required. Then connect any additional system cables, including:
- Chiller connection
- USB cable
- Ethernet cable
Once complete, switch on the mains supply and power the unit via the rear switch.
If the emergency stop is engaged, release the red button to activate the system for operation.
Parameter Verification
Before running any casting programme, it is recommended to confirm all operating parameters.
Using the front touchscreen, select Advanced Info. Key system values will display with colour indicators. Green confirms that parameters are within the correct operating range.
The primary values to verify include:
- Water flow greater than 1
- Water temperature approximately 22–23°C
- Air pressure at or above 6 bar
- Argon pressure between 2 and 4 bar
This ensures the Prometheus is fully prepared for safe casting.
Programme Selection and Test Cycle Recommendation
Prior to casting, a test cycle is advised to confirm correct operation.
The Prometheus includes preset casting programmes for:
- Steel
- Silver
- Gold
- Platinum
Custom programmes can also be created by copying an existing preset, renaming it and adjusting the value settings to match your process requirements.
Manual Component Testing
The Orotig Prometheus allows manual verification of individual machine functions through the controls menu.
This includes testing key mechanical and system components such as:
- Cylinder lifter locking mechanism
- Vacuum pump operation
This is a useful step during first-time setup or routine maintenance checks.
Temperature Configuration by Metal Type
Casting temperature must be selected based on the metal being processed.
For example for silver, a final temperature of approximately 1020°C is selected depending on alloy and setup.
General operating temperature requirements include:
- Platinum: 900°C
- Gold and silver: 650–700°C
Always refer to alloy specifications and programme guidance when selecting temperatures.
Flask and Crucible Selection Guidelines
Correct flask and crucible pairing is essential to prevent metal overflow and ensuring stable casting.
Maximum metal capacities include:
- Up to 140g of 18ct gold
- Up to 90g of silver
- Between 70g and 150g of platinum
Multiple crucible options are supplied with recommendations for specific metals:
- Graphite crucibles for gold and silver
- Ceramic crucibles for platinum
Support rings correspond directly to flask diameter, for example, a 60mm flask must be placed on a 60mm support.
Running the Casting Cycle
Once configuration is complete, the casting process can begin.
Place the crucible into the chamber first, followed by the appropriate support ring. Wearing full PPE, use tongs to position the flask securely onto the support.
Close the chamber and press Start. The casting cycle can be safely monitored through the viewing window.
The touchscreen will display live temperature and remaining cycle time throughout.
Chamber Flush, Casting and Cooling Phases
At the end of the heating cycle, initiate the chamber flush to clean the system prior to casting.
During casting:
- The flask locks into position
- The chamber tilts automatically
- The metal is cast
- Cooling begins immediately after
Please note: The Orotig Prometheus can complete up to four cycles for gold and silver and one cycle for platinum. A cooling period is then needed. For continuous production environments, the use of a dedicated chiller is strongly recommended.
Flask Removal and Cooling Procedure
Once the cycle is complete, full PPE must be worn when removing the flask.
Using tongs, carefully lift the flask from the chamber and place it on a heat-safe surface to cool. Cooling duration depends on alloy type and metal.
Water quenching may be used where appropriate and according to alloy guidelines.
The Orotig Prometheus Automatic Casting Machine delivers automated casting performance in a compact footprint, combining accuracy, efficiency and repeatable results.
If you would like to see the Prometheus in operation, book a demonstration today at cooksongold.com/demo and experience how easily it can elevate your casting workflow.
For more information on How to Set Up & Cast Using the Orotig Prometheus Automatic Casting Machine talk to Cooksongold