

Solenoid Valve Installation Guide
Whether you’re installing a solenoid valve in a gas, water or chemical system, the working principles are similar enough that the process is largely the same. In this how-to guide, we aim to give you a clear set of basic installation instructions for solenoid valves. We’ll also cover what to remember, what to avoid, and the differences between solenoid valve types.
How Does A Solenoid Coil Work?
A solenoid is a coil of copper wire which produces a magnetic field when charged with an electrical current. It is a relatively weak type of electromagnet which does not always have an iron core.
The working principle is as follows:
- Electrical Energy flows through the coil
- The coil produces a Uniform Magnetic Field
- The magnetic field provides energy for linear motion through the centre of the coil
The linear motion is what makes solenoids so mechanically useful. In a solenoid valve, the rod or plunger moves instantly in a straight line along the magnetic field to open or close the valve. Because electrical energy is used to create the field, it is easy to control remotely and programme for automation. The uniform magnetic field causes instant linear motion of a ferromagnetic rod or plunger, and when the current is removed, the magnetic field disappears and the motion is reversed. This is how solenoid valves control the flow of the medium proportional to the voltage applied.
The voltage required varies depending on the application but is most often supplied by a control unit installed remotely from the valves. In irrigation, a relatively low, 24-volt AC is enough.
A Few Do’s and Don’ts
When installing any equipment, it’s important to avoid mistakes that are easy to make but render the operation useless. For example, did you know that any contamination inside the solenoid valve can cause problems that may affect the whole system? Here are a few tips to help you install a solenoid valve perfectly every time.
Do:
Install the valve the right way around. There is usually an arrow on the housing which indicates the direction of flow, so make sure you check this first.
Install the valve upright with the solenoid housing vertically upward where possible. This will protect the solenoid in the event of leaks and support its proper function.
Keep the valve clean during installation. This may mean keeping it in the packaging until you are ready to install it, avoiding using oily cloths or placing it in dusty environments.
Tighten the Solenoid Properly. Leaving it loose can mean misalignment, causing leaks.
Check the parameters. Use the correct voltage, within the fluctuating scope of the voltage.
If you’re installing the valve in a water system such as for irrigation or water dispensing, ensure you use waterproof gel connectors to attach the low-voltage leads.
Place a Filter to clean the medium of any suspended particles before the valve. If there is dust or impurities in the medium, whether gas or liquid, this could cause a blockage over time.
Leave Space around the valve for maintenance access and to allow it ventilation for cooling.
Use a fuse. Whether you choose to use a fuse wire or a fused switch, this will protect your circuitry from surges.
Do Not:
Connect a power supply at a higher voltage than the rating on the valve’s specification, as this could burn out the solenoid coil.
Allow dirt to enter the valve during installation. This could block the valve and cause problems.
Connect too many valves. There should be a maximum of 3 valves for each control unit terminal.
Remove the solenoid casing in dirty or wet areas, as contaminants can potentially enter the coil and impede the working.
Checking Solenoid Valve Properties
You’ll likely have checked this when ordering a solenoid valve, but it is essential to make sure you have the correct valve for the application. Valves will have a label which shows the valve’s specifications, including:
- Product Code e.g. 21H11K0B120. This is unique to the product.
- Power (W) e.g. 12W. It is extremely important to use the correct voltage. Too high will burn out the coil, and too low will not create a strong enough magnetic field to move the plunger.
- Port connection (e.g. G ⅜). This shows the diameter of the pipe thread in inches.
- Operating Pressure (min-max) for AC/DC current e.g. 0-(16/10) bar, in which 16 is the maximum pressure with AC and 10 is the same for DC.
The main specifications to check include the operating power and Port connection and operating pressure. Attempting installation when these details are incorrect will unfortunately just lead to a broken valve. For all solenoid valves supplied by Avalco, specifications are also available on the product page as PDF files.
How To Install A Solenoid Valve
This guide is a basic “how to”, supporting installation as a quick-look cheat sheet. However, there are many different types of solenoid valves available, and we encourage you to check the product manual before you start. This is to ensure you do not miss vital steps specific to that valve model.
- Check the valve voltage matches the supply voltage.
- Isolate the supply pressure and ensure the system has cooled before you start.
- Unscrew the connection where the valve is to be installed and clear any debris or residue from the pipeline, such as sealant, oil or dust.
- Check the directional flow indicated on the valve body by an arrow (→). Position the valve this way around in line with the pipeline.
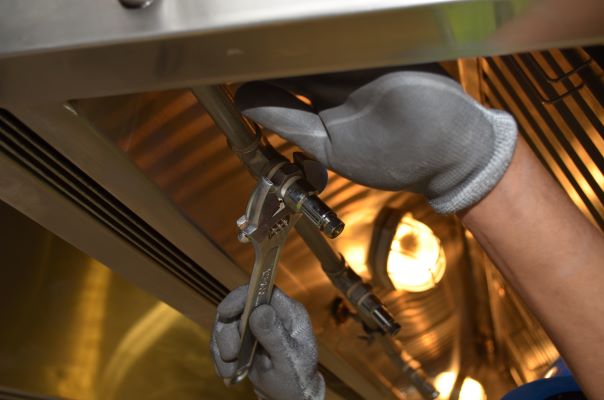
- Connect the valve. Usually, this will involve a threaded connection at both the inlet and outlet. You may want to hold the valve steady with a wrench while you fasten it.
- Wire the solenoid.
- Connect wires to the two vertical pins on the coil housing using spade connectors or another type of connector.
- Connect another wire to the third, horizontal pin and connect this to ground (usually the negative terminal of the power supply).
- Connect the positive wire to the switch or control panel. Then connect this to the power supply.
- Connect the negative wire to the power supply. When the switch is activated, the valve will work.
- Test the circuit to make sure the valve is fitted correctly. Turn on the supply and test again, checking for leakage.
Solenoid Valves for All Purposes
In conclusion, we hope this installation guide has provided you with clear and concise instructions for solenoid valve installation. At Avalco, we are a solenoid valve supplier, trusted by a wide range of industries and tradespeople across the UK. Our commitment to quality and reliability ensures that you have access to the finest solenoid valves for any application, including explosion-proof solenoid valves for high-pressure or hazardous environments.
From automated irrigation to gas and fuel lines, our comprehensive stock of solenoid valves provides a solution with optimal performance for your projects. Browse our full range of products and find the right valves for the job, or get in touch and let us help you find a solenoid valve that fits your requirements.
For more information on Solenoid Valve Installation Guide talk to Avalco Ltd