 Add My Company
Sign In

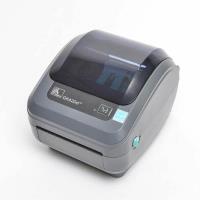
The quickest and easiest way to calibrate your Zebra GK420D label printer is to hold the green FEED button down. First the light on the button will flash once then it will do a double flash. Let go of the button after the double flash and the printer will start to feed labels forward slowly. This is the calibration process and only takes a few seconds.
If you are using Zebra Designer to print your labels then you may find it easier to get the label design on the screen then go to FILE and PRINTER SETTINGS then under the ADVANCED SETUP tab simply press the CALIBRATE button in the bottom right corner of the screen.
If neither of the above works after a couple of attempts then make sure you have the correct label size in the settings of your label design software and you are using the correct gap sensor. Labels on a backing paper with a gap between them and no black line printed on the reverse of the backing paper should use WEB SENSING or LABEL WITH GAPS sensor and if you use continuous label or card stock or labels with gaps that also have a black line printed on the reverse of the backing paper then you should select the MARK SENSING or LABEL WITH MARKS sensor.
If you still cannot get your printer to calibrate then you will need to print a profile of the label sensor settings. To do this simply hold the green feed button. The light on the button will flash once then do a double flash then three flashes. Keep button held until it flashes seven times then take your finger off of the button. This will then print a graph that looks like the one below:
For more information on How do I calibrate my Zebra GK420d Label Printer? talk to Northern Label Systems Ltd
Enquire Now
More Blogs
List your company on FindTheNeedle.

