 Add My Company
Sign In

n our final installment of this beginner jewellery making tools series of blogs, we walk you through the tools of the trade you’ll need to refine and finish your latest precious metal projects.
There’s nothing quite like coming to the end of a long jewellery making project and reaching that rewarding stage of finishing the piece for a professional look and high shine. As a beginner you may need some guidance when it comes to finishing techniques for metal jewellery pieces and tips on how to use certain jewellery polishing tools. Use our advice below on three jewellery finishing techniques for beginners and the accompanying tools you need to transform your jewellery pieces.
Sanding
When working with precious metal pieces you’ll inevitably need to sand them, especially after soldering. Excess metal may have been left behind, and you will have to sand away fire scale, pickle residue and potentially scratches caused when constructing the piece. It is also important to prepare your pieces for polishing by sanding them – the more work you put into this pre-polishing stage the easier it will be to create a professional shine. Working by hand in this pre-polishing stage will give you greater control over the pressure you put onto the metal and it will allow you to file any marks or scuffs away for a fine surface ready for polishing.
You’ll need:
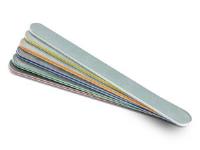
Emery Paper and Sticks
Invest in sanding sheets with varied grades. Using the coarsest sanding paper (400 grit) through to the finest (1200 grit) will give you the best results. Using flexible sheets also means that you can wrap them around buffing sticks for use with pieces with curved edges. Buffing sticks are a great investment. Simply replace the emery paper when spent and continue to sand your jewellery pieces.
Barrel or Tumble Polishing
Tumble polishing is an efficient way of polishing precious metal pieces when you have a lot of small pieces to get through, saving you time and effort polishing intricate pieces by hand. Also known as barrelling machines or rotary polishers, they use steel shots (small, round and pointed steel pieces) to reach every surface of your metal pieces while tumbling in the machine. A soap solution or polishing compound known as Barrelbrite is also mixed with water and added to the barrelling machine before the machine’s motor tumbles all the materials inside, leaving you with a professional finish.
You’ll need:
Barrelling machine
Steel shot
Barrelling compound
Start out with a barrelling starter kit as this will include all the elements you need to get going: the barrelling machine, steel shots, and barrelling compound. However, it’s important to remember that tumbling your pieces will not remove scratches or marks in your metal. Taking the time to remove any scuffs by hand by sanding before you take the next step will mean that your jewellery will have a refined finish. As you’re starting out in your jewellery making career you may want to invest in a barrelling machine once you’ve mastered sanding and polishing by hand.
Mop Polishing
Drill polishing with a specialised handheld motorised rotary tool is an excellent way of getting accurate results with your jewellery. All the polishing burrs you use in conjunction with your handheld polishing tool have a slightly different function so it may be worth investing in a beginner’s drill polishing kit – this will give you all the attachments required to improve on your jewellery finishing techniques without having to invest in more technical mop polishing motors just yet.
At this stage you’ll need to be most concerned with small, soft polishing mops as opposed to more abrasive discs. Polishing mops come in varying sizes and are made with different materials such as felt, calico, wool, and swansdown. A denser mop made from felt or calico should be used in the first stages of polishing. You should then move onto using a softer mop made from wool or swansdown for the final buffing stages. Remember to apply a polishing compound generously to your mop before you begin polishing – an all-purpose polishing compound is the ideal choice for beginners.
You’ll need:
Rotary drill
Polishing mop kit
Polishing compound
Remember that using a motorised tool creates a lot of heat and debris so always take the necessary safety precautions before working on your jewellery finishing techniques. Make sure the room you’re working in is well ventilated and that you are wearing safety glasses.
A large polishing motor can be used to an excellent finish and shine with your precious metal projects. However, as a beginner you may first want to refine the jewellery finishing techniques required by hand before considering an investment in an industrial-sized polishing motor. When it comes to intricate surface finishing techniques with large motors and mops, it can be difficult to master as it requires a large amount of skill as well as safety awareness. By slowly mastering the techniques of sanding, tumbling and polishing you will then be able to move into using more complex tools and techniques for that perfect finish.
Want to know more about which tools you should invest in as a beginner jeweller? Take a look at our comprehensive Beginner’s Guide to Jewellery Making Tools to help you become a master jeweller.
For more information on Jewellery Finishing Techniques and Tools For Beginners talk to Cooksongold
Enquire Now
List your company on FindTheNeedle.

