Sign In
How To Prepare A Surface For An Adhesive
26-02-2015
Preparing surfaces for glue is just as important as choosing the correct glue for your gear in the first place.
Unfortunately, it can be extremely difficult to choose the correct preparation method even for common services – fortunately we've provided you with these preparation techniques.
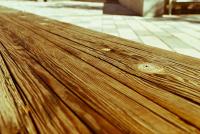
Prepare Wood For An Adhesive
First off – and bear in mind that this is coming from a site that sells abrasives – it is a common myth that making the wood rougher makes glue stick better.
The smoother the joint is, the less glue you need to join the surfaces together. Less glue also means fewer 'imperfections' (such as bubbles, or dust caught in the glue), and fewer imperfections mean fewer stress points and thus a lower chance of failure. Wood glue also tends to shrink when it dries – if you are joining two rough pieces of wood, the surface may be too full of gaps, meaning that as the glue dries the surfaces will pull away and break.
It is essential that you clamp wood for this exact reason, as this keeps the surfaces in contact while the glue shrinks.
Some smooth surfaces, such as burnished areas, will not bond. A burnished or sealed wooden surface will need to be sanded until the burnished or sealed layer has been removed – you can test for this by putting drops of water on the wood. Burnished wood will repel the water and result in somewhat-spherical beads of water, while unburnished wood will allow water to soak in, with less or no beading.
Oily wood (like teak) will also repel glue. For teak, you should brush the surface with acetone and then wipe with a clean piece of cloth before you apply the adhesive.
To smooth a surface in preparation for gluing, you should use a plane – sanding will usually result in a slightly rounded smooth surface at best, which will be less suitable for a strong joint. If you work with wood a lot, then getting a jointer could be worth the cost.
Prepare Plastic For An Adhesive
Preparing plastic for an adhesive involves either degreasing, abrasion, or unique treatments such as flame treatment or immersion in a unique chemical etching solution. Mostly, you should want to combine these techniques.
The preparation of plastic for adhesives differs by the type of plastic involved.
Degreasing usually involves three steps. First, a quick rinse or clean with the solvent you want to use. Second, a complete immersion in a solvent bath, or possibly multiple solvent baths. Finally, clean and dry the plastics.
Surface abrasion necessarily includes a degreasing and cleaning step, both before and after abrasion. Some plastics don't respond well to abrasions, so be sure to research your specific material before abrading.
Special treatments should only be attempted if you are one hundred percent confident that they are suitable for the specific plastic you are dealing with, and as such fall outside the scope of this article. As special treatments are often necessary for a successful adhesion, find out what kind of plastic you are dealing with before you attempt to glue it together.
Prepare Copper For An Adhesive
Copper ideally needs to be prepared with a black oxide finish. This is not something that the average person will be able to accomplish; it should typically be carried out by a specialist metal finishing company.
Alternatively, a completely clean copper surface is a good second choice. Within about two hours of cleaning a surface, however, you'll find that the copper surface layer has oxidised, making it unsuitable for bonding. For this reason, you need to work quickly. Use a standard copper or copper alloy cleaner, rinse with distilled water, and then either dry with an ordinary paper towel or rinse again with isopropyl alcohol.
After drying, you've got between 30 to 60 minutes to start the bonding process. So Work quickly!
Prepare Aluminium For An Adhesive
To be safe, use a degreaser that is described as aluminium-safe, or ideally a degreasing product specifically designed to work with aluminium.
Before gluing, prepare aluminium with a substance called Alodine. This product helps to prevent corrosion (oxidisation) and provides a good surface for bonding, whether you're applying glue or paint.
Prepare Glass For An Adhesive
To prepare glass for an adhesive, first prepare it with a degreasing product. Organic solvents are recommended.
Some sources recommend sandblasting or etching glass before joining; this may make joining easier, but it's also going to make the glass (already fragile) weaker. If shattering or breaking is a concern or – even worse – a safety hazard, we would usually recommend against abrading the surface first.
Instead, we would recommend using an adhesive primer for glass, which should be sufficient for most purposes.
Prepare Steel For An Adhesive
Steel would traditionally be cleaned with trichloroethylene, but this is no longer widely available or indeed environmentally friendly.
Instead, an easy solution is to clean firstly with paraffin and secondly with white spirit.
Abrading the surface should help with steel, followed by another degreasing and final rinse.
Still Confused?
This general information is intended for a wide audience, and isn't intended as advice for industrial processes.
If you're looking for a particular adhesive, we have multiple types of adhesives, suitable for wood, plastic, glass and metal glues.
If we didn't answer your question, or you have extra useful information to add to the article, please feel free to get in touch by email or on social media.
Please be aware that FineCal cannot accept any responsibility for any damages caused by using any of the products or methods we’ve mentioned.
For more information on How To Prepare A Surface For An Adhesive talk to FineCal
Welcome back to FindTheNeedle.
Not registered? Get listed — most visitors don't have an account yet.
List your company on FindTheNeedle.