Sign In


Ever wonder why your homebrew doesn’t look or taste as good as your favourite beers at the pub? After hours of slaving away on your brew and weeks of patiently waiting for it to ferment and condition, it can be very disheartening when the final product doesn’t meet your expectations. At Adams Gas, we understand the fun of homebrewing, but we also recognise the frustrations and limitations of the hobby.
Whether you’re just starting out with a kit brew that you got for Christmas or have been all-grain brewing for years, here are some tips and tricks that will ensure your homebrew doesn’t taste or smell like homebrew.
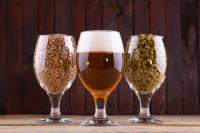
Light beer and ingredients
Chill your Wort Out
One thing that often makes homebrew look and taste like homebrew is a condition known as ‘chill haze’ which is primarily caused when the wort is not quickly cooled after the initial boil. As the name suggests, this is a haziness that appears in the beer once it’s chilled. In and of itself, this isn’t such a horrible thing, except that it underlies a much more serious issue: colloidal instability. Without getting too technical, this is a condition where the beer’s structural integrity is impaired on a molecular level; more serious than the haziness caused by aggregating particles is the drastically compromised shelf life of the beer, which ultimately leads to a very unappetizing looking and tasting brew.
Regardless of whether you are extract or all-grain brewing, it’s essential that you cool the wort down as quickly as possible. Aside from chill haze, there are other more serious reasons to avoid a prolonged cool down period for your wort; as the wort’s temperature falls below 60°C, it becomes increasingly susceptible to wild yeasts and bacteria. Your goal should be to drop the temperature as quickly as possible to avoid possible contamination of your brew.
To avoid these issues (and save loads of time), breweries use devices called plate chillers which can cool down recently boiled wort to room temperature in a matter of seconds. Lacking this fancy (not to mention, expensive) gear, a lot of homebrewers rely on the ‘ice bath’ method, which, as it sounds, involves placing the pot of boiled wort into a bathtub filled with ice water. However, this is neither a very convenient nor efficient method, and it can still take hours for your wort to cool down to the appropriate temperature, often resulting in chill haze or other issues.
However, this can all be avoided by using an immersion chiller. Similar to a plate chiller, an immersion chiller is a tool that will quickly cool down your wort. Aside from the price, the main difference between the two is how they function. In breweries, hot wort is pumped through a plate chiller on its way into a fermentation tank. By the time the wort reaches the fermentation tank it’s already at room temperature. An immersion chiller, on the other hand, is immersed in the boiled wort, and cold water is pumped through its coils. This contraption is made from small diameter copper tubing that has been formed into a series of rings, all of the same diameter, that form a kind of cylindrical shape, which is designed to fit inside a brew kettle.
Unlike plate chillers, wort chillers don’t require a pump; you simply hook up one end to your kitchen or bathroom tap, turn on the cold water, and let the other end of the hose run into your sink or bathtub. The water flows through the copper tubing and out through the hose attached to the other end. The only drawback to using an immersion chiller is that they do potentially waste a lot of water, but they work extremely well; wort temperature can usually be dropped to room temperature within 15-20 minutes. And the water that runs through your chiller can be collected and re-used in various ways around your home or garden.
You don’t even need to worry about sanitising your immersion chiller before use. Assuming that it’s been well-cleaned with soap and water, just place it in the wort for the last 10 minutes of the boil, and it will be sterilised. Best of all, immersion chillers are very cheap, especially when compared to plate chillers. Better yet, you could make your own. If you’re reasonably handy in the DIY department, as most homebrewers are, it’s extremely cheap and easy to make your own immersion chiller, and there are bountiful tutorials to be found online that will walk you through the process. Making your own homebrewing gear, designed with your particular wants and needs in mind, is also very satisfying.
immersion chiller and boil kettle
Befriend a Hop Spider
Any homebrewer who’s ever brewed using whole leaf hops knows how messy they can be to work with, not to mention how much space they take up in your boil kettle. Even if you use hop pellets, which are much easier to work with and offer far more consistency in terms of IBUs (International Bittering Units) and flavour, they can still leave a heavy sediment in your wort after the boil, if pitched directly into the boil kettle.
The last thing you want after a successful boil is for a bunch of sediment, including hop sludge, to get transferred into your fermentation vessel. However, if you’ve pitched your hops directly into a boil kettle with a ball valve spout near the bottom, it’s next to impossible to prevent this from happening. You could try straining them out with a sieve – a lot of homebrewers use this method – but’s it’s often time-consuming and inefficient, and there’s increased likelihood of contaminating your wort, which is a big no-no!
Perhaps the easiest way to avoid all of this hassle and worry is by using a hop spider. Yes, it’s a strange and somewhat misleading name – it has nothing to do with spiders or insects – but it is a seriously handy piece of kit to have for homebrewing. Basically, a hop spider is a nylon mesh bag or stainless steel mesh basket that sits in your wort; it’s held in place by 3-4 metal arms (perhaps resembling the legs of a mechanical spider) that rest or clip on the top outer lip of your brew kettle.
You simply drop the hops into the bag or basket, following the hopping schedule for whichever recipe you’re brewing, without worrying about hop sludge clogging up your brew kettle’s spout or fouling your brew. You can even insert your immersion chiller around it, although this might take a bit of careful manoeuvring. While you can buy reasonably cheap hop spiders from homebrew shops online, as with the immersion chiller, it’s super cheap, easy and rewarding to simply make your own. Again, you’ll be able to find many online tutorials to help you through the process.
Adding hops to a home brew
Force Carbonate in Corny Kegs
CAMRA’s real ale dictum aside, there’s actually nothing wrong with artificially carbonating beer – it doesn’t make it any less ‘real’, and it certainly doesn’t cause it to be any less tasty; this is especially true for homebrew! While we understand that there’s a certain romance to naturally carbonating your homebrew in the bottle, there are a number of reasons why you should consider using beer gas to force carbonate your brew.
First and foremost, it saves you a lot of time, hassle and wait; for most homebrewers, the whole bottling process can be an excruciatingly time-intensive and painstaking endeavour, fraught with multiple opportunities for things to wrong. If you’ve successfully managed to brew and ferment your beer, the last thing you want is to contaminate your brew with one careless oversight. But there are multiple stages to bottling homebrew, each one fraught with opportunities to contaminate/ruin your beer.
It’s absolutely essential that everything that comes into contact with the beer at this stage – bottling bucket, bottling wand, bottles, caps, sugar solution, etc. – is clean and sanitised. The whole bottling process can easily take 2-3 hours from start to finish, and that’s assuming everything goes according to plan. As if that weren’t enough of a faff, the worst part is what comes after the bottling: the big wait. Bottle conditioning for most homebrewed ales takes at least two weeks at room temperature; this means that by the time your brew is ready to be enjoyed almost a month will have passed since the initial brew. That requires a lot of patience – talk about delayed gratification!
Even if the bottling process goes off without a hitch and your beer doesn’t get contaminated, there are still two other potential issues that you might have to deal with: carbonation inconsistency and over carbonation. If you do decide to bottle condition your homebrew, we strongly recommend using carbonation drops; the main advantage to using these, aside from avoiding the need for a bottling bucket and sugar solution, is consistency. When introducing a sugar solution to your beer before bottling, there’s always a chance that some bottles will be more or less carbonated than others; using carbonation drops can mitigate this risk. However, the real worry here is the dreaded bottle bomb. Yes, it is possible to over-carbonate your beer through bottle conditioning, and the results can be disastrous – it’s not called a bottle bomb lightly.
You can avoid all (or at least most) of these issues by force carbonating your beer. If you’re an experienced homebrewer who brews regularly (or if you’re interested in becoming one), we highly recommend investing in 1-2 Cornelius (Corny) Kegs. These can easily be obtained online, either on eBay or through a reputable homebrew supply shop.
Corny kegs are perfect for containing 19-litre batches, which is the quantity most serious homebrewers brew. Our high-quality beer gas cylinders are the perfect way to force carbonate your beer, using these kegs. Force carbonating your beer will take minutes, as opposed to weeks. You and your friends will be able to enjoy the fruits of your labour the day you transfer your beer into a Corny keg, without having to suffer through days and weeks of waiting and uncertainty.
Yes, there is still a chance of contaminating your beer using forced carbonation, but as there are fewer steps to this process – as opposed to bottle conditioning – you’d have to be really careless for this to happen. And while there is also the risk of over-carbonating your beer through forced carbonation, the good news is two-fold. Firstly, there’s little to no risk of a Corny keg exploding, unlike a bottle bomb. Secondly, if your beer does get over-carbonated, just let release the excess pressure and let it sit a while in the tank until it reaches the desired level of carbonation – you definitely can’t do this with bottle conditioning!
brewer carrying corny kegs
If you’re ready to take your homebrewing to the next level, give these tips a try and see if they don’t bring your beer closer to anything you could find on tap in a pub. For more information about how we at Adams Gas can help you achieve your homebrewing potential, get in touch with us today.
For more information on TIPS AND TRICKS TO MAKE YOUR HOME BREWING A GREAT SUCCESS talk to Adams Gas
Welcome back to FindTheNeedle.
Not registered? Get listed — most visitors don't have an account yet.
List your company on FindTheNeedle.